Server Installation
Server Installation
Majora supports three installation options so you can balance speed, customization, and performance.
Install with Docker (All-in-One)
# Install Docker
yum install -y docker
# Pull the image
docker pull registry.cn-beijing.aliyuncs.com/iinti/majora3:all-in-one
# Start Majora
docker run -d --network host -v ~/majora3-mysql-data:/var/lib/mysql registry.cn-beijing.aliyuncs.com/iinti/majora3:all-in-one
This is the quickest way to get Majora running—one Docker command and you are done.
Pros & Cons
- Pros: No environment preparation. As long as your Linux host can run Docker, you can spin up Majora immediately.
- Cons: The image bundles both MySQL and the Java service. A container cannot detect a crash of the child processes, so you lose the self-healing benefit. In addition, the database lives inside the container, so you cannot horizontally scale multiple server nodes that share one database.
In practice a single server already handles substantial traffic, so this option is perfectly fine for small and medium workloads.
Deploy with Docker Compose
The service depends on MySQL, so Docker Compose offers a clean way to run both containers.
Install Docker & Docker Compose
Skip if they are already present.
# Refresh packages (recommended if the system is outdated)
sudo yum clean all
sudo yum makecache
sudo yum update

# Install Docker CE
sudo yum install -y yum-utils device-mapper-persistent-data lvm2
sudo yum-config-manager --add-repo https://download.docker.com/linux/centos/docker-ce.repo
sudo yum install docker-ce docker-ce-cli containerd.io

# Enable Docker on boot
sudo systemctl start docker
sudo systemctl enable docker
systemctl enable docker.service
systemctl start docker.service

# Install docker-compose via pip
sudo pip install docker-compose
Start Majora
curl https://oss.iinti.cn/majora3/quickstart.sh | bash- Make sure Docker and Docker Compose are installed.
- MySQL will take a bit longer to boot the first time; if the Majora server fails to start, wait for MySQL and run
docker restart majora3-server. - All containers use default parameters, which makes this option great for evaluation environments. Majora does not rely on exotic dependencies, so this setup can also be promoted to production if needed.
Alongside the quick start, you can scale out horizontally by deploying multiple server nodes that share a database.
Manual Deployment
Majora is a Java application backed by MySQL. If you prefer to control every component manually:
Prerequisites
- Download the release package
- Install JDK 17
- Install MySQL (or provision a managed MySQL service)
Configure & Initialize
- Unzip the package.
- Create the database schema using
assets/ddl.sql. - Adjust the configuration files:
- Majora is built on Spring Boot. Edit
conf/application.propertiesto point to your MySQL instance. - Static assets live under
conf/static/*. You can replace them if you customized the frontend (Majora’s frontend is open source). - Documentation assets are located at
conf/static/majora-doc/*.
- Majora is built on Spring Boot. Edit
Run
- Execute
bin/startup.sh(or the.batfile on Windows). - Watch the logs to ensure the service starts correctly.
Verify the Deployment
Open http://<server-ip>:<web-port> (for example http://127.0.0.1:6879/). The first registered account becomes the administrator. After signing up, set the proxy authentication username and password (for example admin/admin).
If you can register and sign in, the deployment is successful.
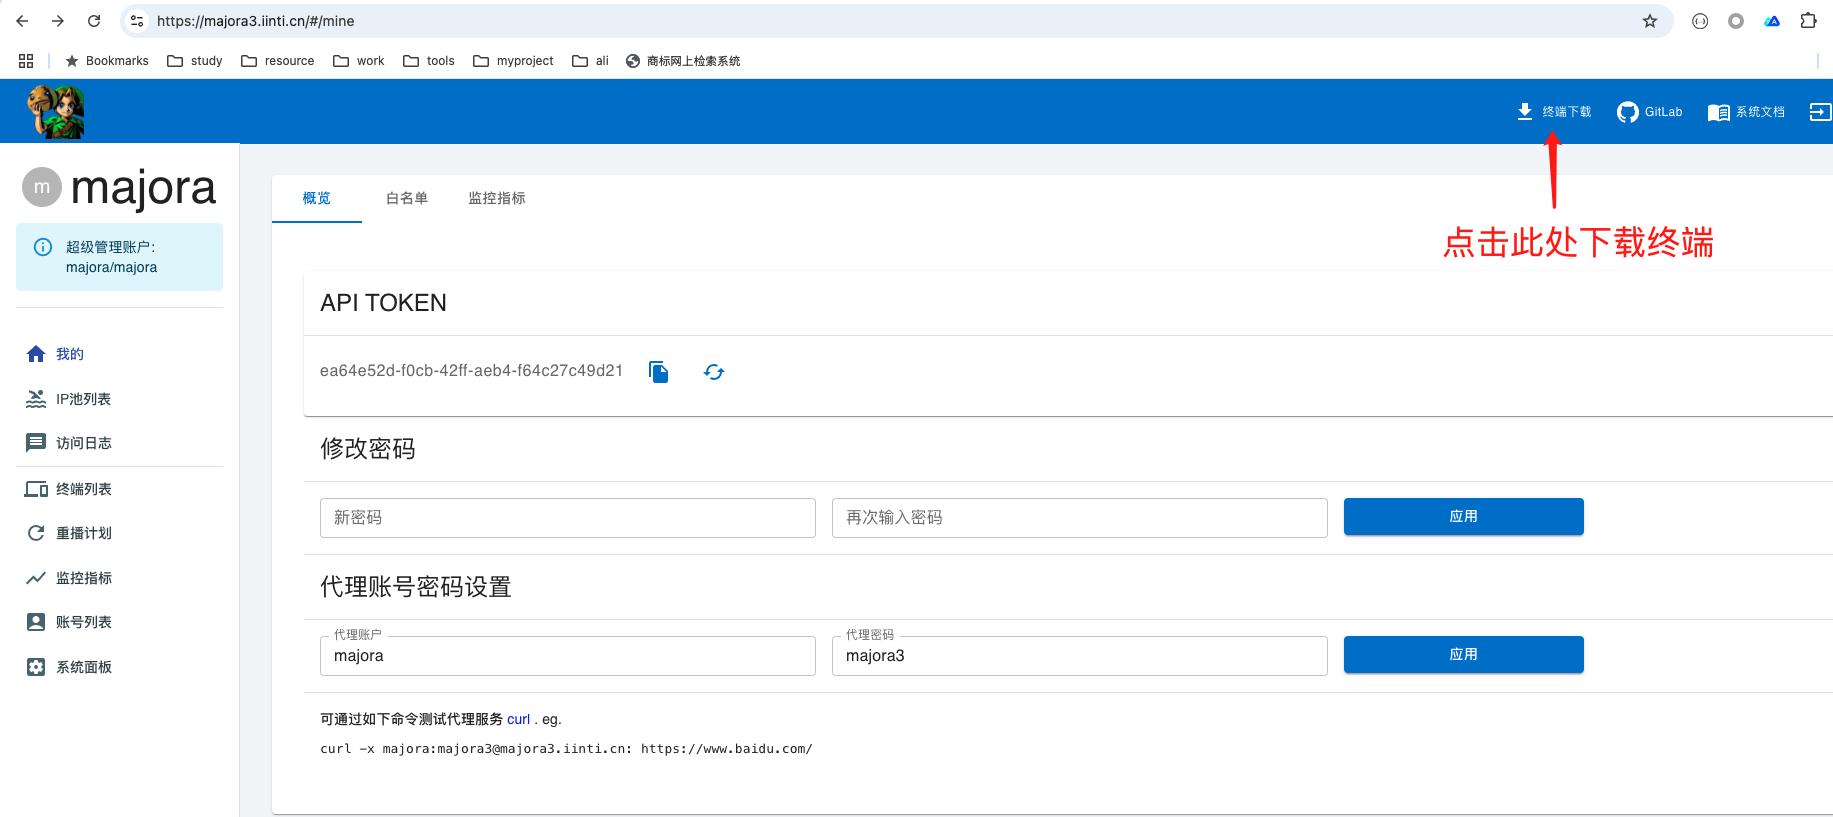
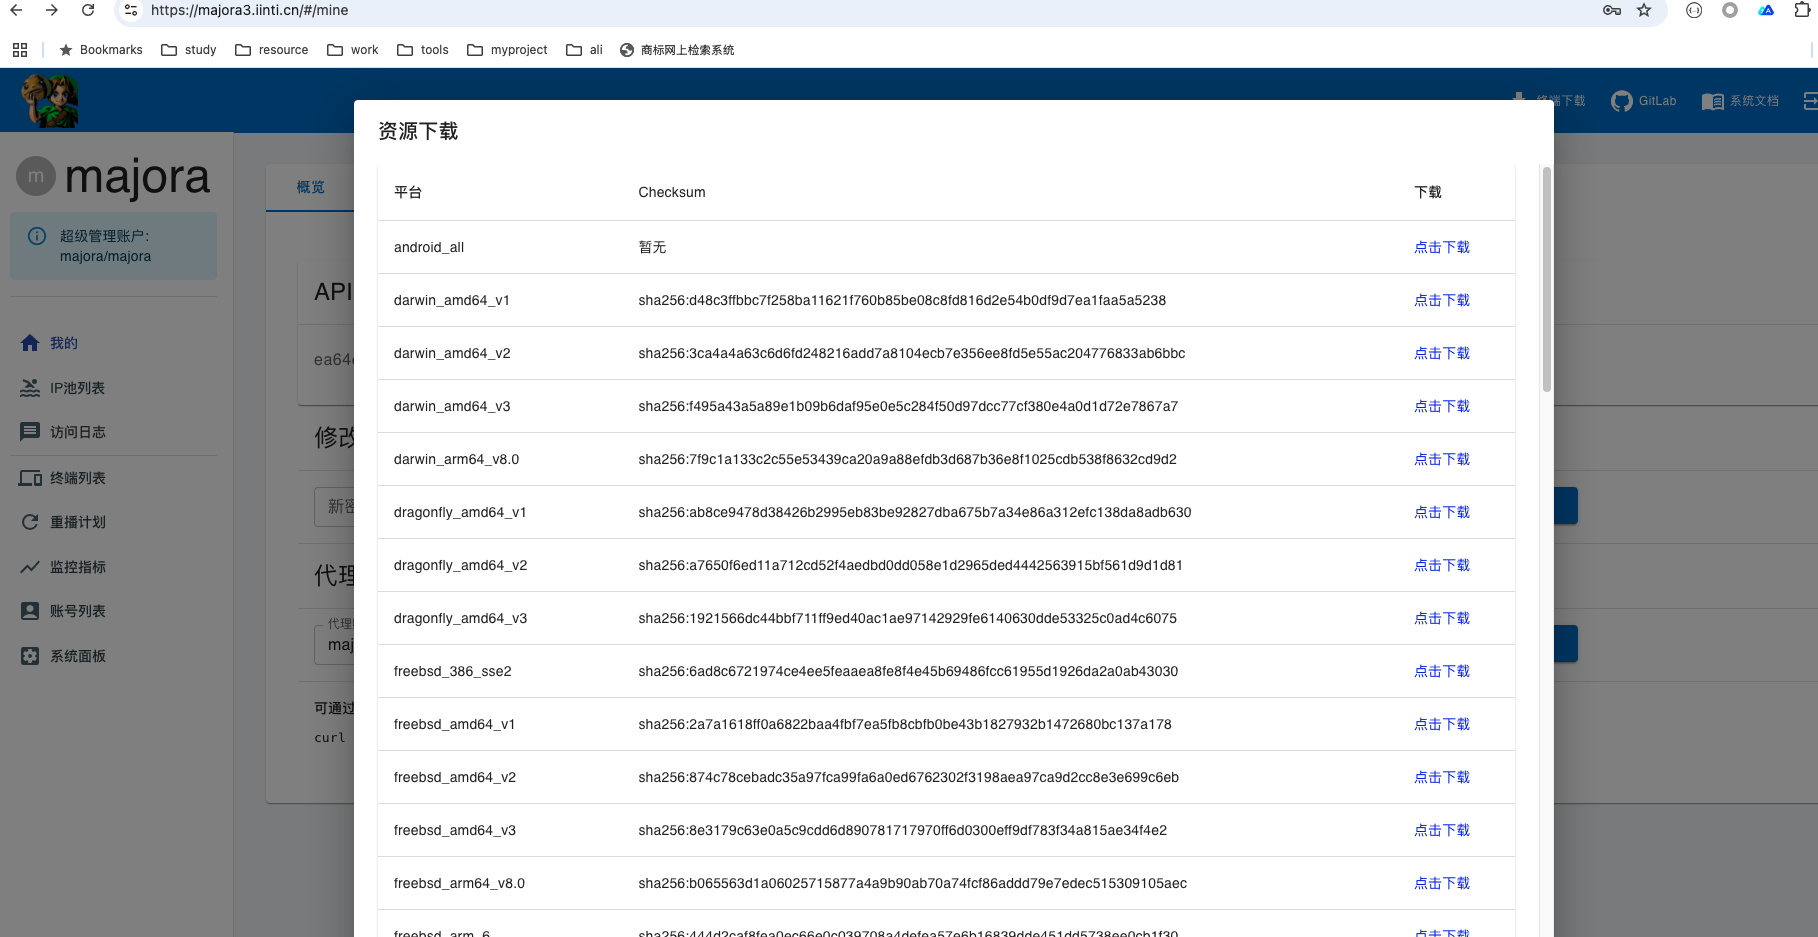
Endpoint Downloads
After the backend is up, click Endpoint Downloads in the top navigation bar to grab the client package for your platform.